A Beginner’s Guide to Shooting Stars & Galaxies:
Your First Step into Astrophotography
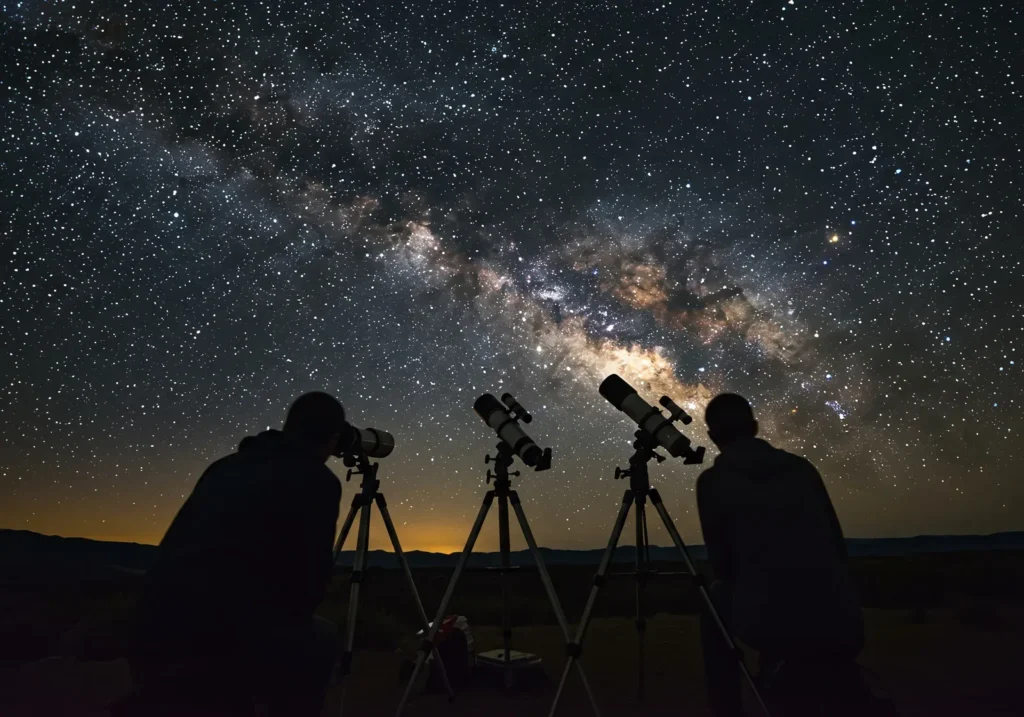
Standing under a clear night sky can be a special and calming experience. The sounds and sights of the world around you fade away. You get to connect to the billions of stars and other celestial bodies that exist in the universe.
Astrophotography is about capturing and preserving that unique experience. It is also a popular activity. People can now do it without having to undergo years of training, using telescopes, or expensive photography equipment. All you need is a camera, a little bit of curiosity, and patience!
I’ll never forget my first attempt at photographing the night sky I was standing alone under the night sky with my tripod, my heart racing, convinced that I was going to photograph the galaxy. All I captured was a blurry image that looked more like a cloud than the Milky Way. However, with one simple focus trick and a few other adjustments, my next shot had diamonds that looked like stars. With some practice, you can achieve that.
If you love capturing the cosmos, you might be ready for a new frontier. Learn how to shoot in another vast, dark environment with our guide to underwater photography.
Step 1. Gather Your Gear (You Need Less Than You Think)
I want to dispel a common myth: the most costly camera is not what captures the most stunning astrophotography, it is about how you use the camera you have. Here’s the basic kit that’ll help you go from starry-eyed beginner to a cosmic storyteller:
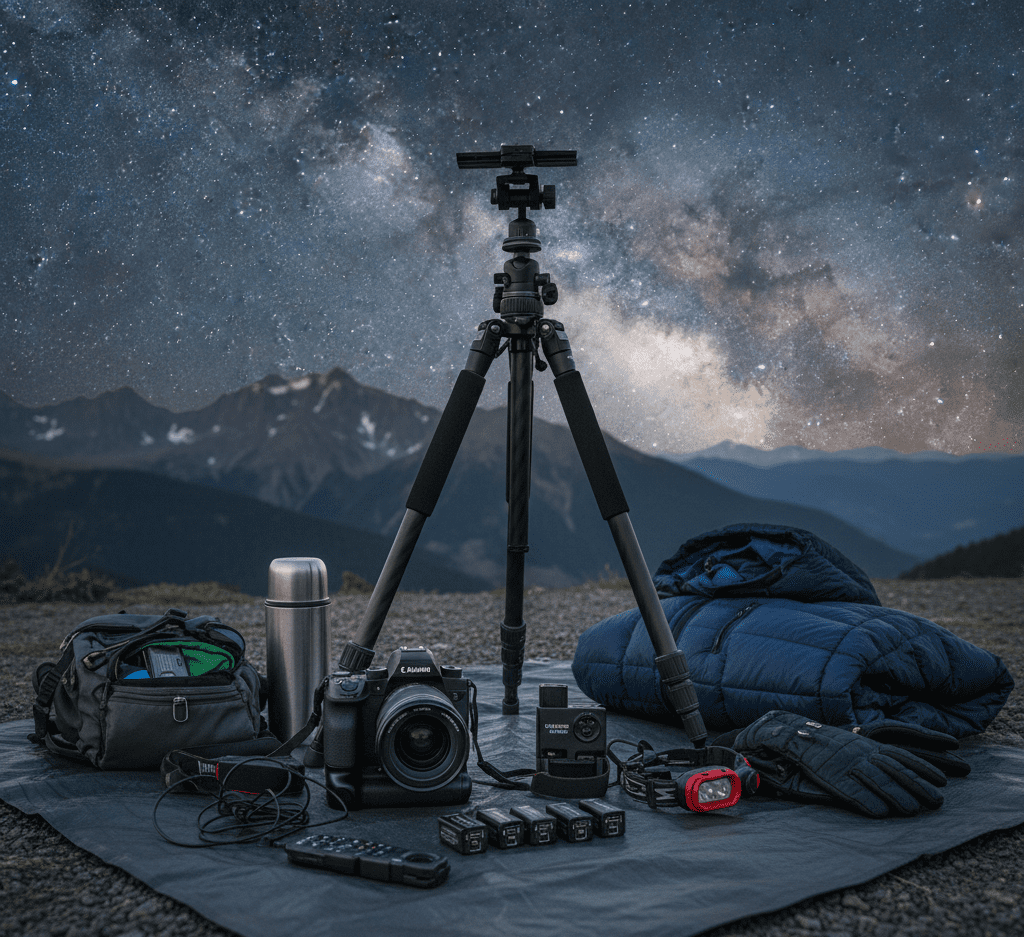
Camera with Manual Mode
Sturdy Tripod
Headlamp or Flashlight
Planning App (PhotoPills, Stellarium)
Wide-Angle Lens (14–24mm)
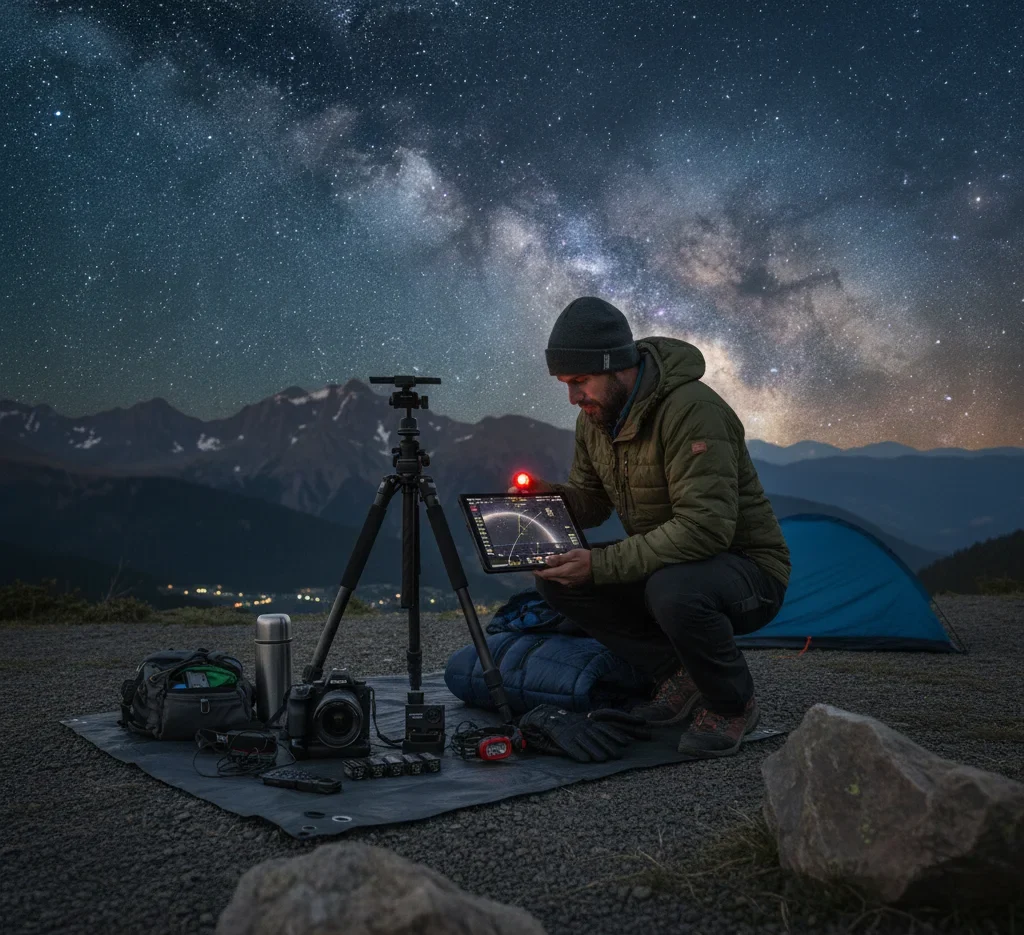
Step 2: Plan Your Night Like a Star Hunter
Astrophotography takes planning. That is the art of the process.
Choose a dark site. The more distance from city lights, the more stars you will see. The Light Pollution Map and Dark Site Finder apps are good for finding the best places. Depending on the moon phase will also help. A full moon is beautiful but it’s bad for astrophotography. A few days before a new moon or just after is best because the sky is darkest.
Lastly, check on the weather. Cloudless nights are great but don’t worry if there are clouds. Thin clouds can create a nice moody effect.
Quick tip: If you are in the Northern Hemisphere, you can see the core of the Milky Way from March until October. At the beginning of that time frame, it rises in the sky before dawn. Later, it sets just after sunset.
Step 3: Use This Simple Camera “Recipe”
Learning how to use a camera can be a bit intimidating, but you will see how simple it actually is once you grasp the basics. it just takes a bit of practice. Just make sure to get the ingredients right for your recipe, and the stars will shine in your photograph.
Here are the best settings to start with:
Setting | Recommended | Why |
|---|---|---|
Mode | Manual (M) | Full creative control |
Aperture | f/2.8 or lower | Lets in more light |
Shutter Speed | 15 seconds | Bright stars, minimal trails |
ISO | 3200 | Boosts light sensitivity |
White Balance | 4000K | Keeps colors natural and accurate |
If the photograph is too dark, you can increase the ISO. If it is too bright, lower the ISO. Also, always shoot in RAW. It will always be easier to edit photos that are in RAW than in JPEG.
Step 4: The Secret to Perfect Focus (Don't Skip This!)
If you want a photograph to look great, you must make sure to get the focus right. Having blurry stars is every beginner’s nightmare, but the good news is that there is a way to get it right. There is a straightforward method.
Here’s the trick I use every time:
Switch to Manual Focus
Autofocus doesn’t work in the dark.
Use Live View
Turn on your screen and zoom in on a bright star or distant light.
Adjust Slowly
Twist the focus ring until the star becomes a tiny, sharp dot
Test and Zoom In
Twist the focus ring until the star becomes a tiny, sharp dot
It might take a few tries, but the difference is huge once you’ve nailed it. I still remember the first time my stars were sharp I did a little happy dance right there in the desert.

Step 5:When to Shoot – Month by Month
Different times of the year mean you’ll have to shoot at different times of the evening (or early morning) while the Milky Way is low enough in the sky. My favourite months to shoot the Milky Way are May/June (for a rising Milky Way image) and September/October (for a setting Milky Way). Use a light pollution map (like LightPollutionMap.info) to find a location away from city lights. National parks and remote rural areas are ideal.
That’s because the hours are more sociable for shooting during these months you don’t have to wake up at 3 AM to get the perfect shot!
Milky Way Shooting Times by Month
Month | Rising Time (Approx. 40° Elevation) | Setting Time (Approx. 20° Elevation) |
|---|---|---|
February | 2 AM – dawn | — |
March | 12 AM – 4 AM | — |
April | 9 PM – 1 AM | — |
May | 7 PM – 11 PM | — |
June | From dark – 8:30 PM | 4:30 AM – dawn |
July | From dark – 6:30 PM | 2:30 AM – 4:30 AM |
August | 12:30 AM – 2:30 AM | — |
September | 10:30 PM – 12:30 AM | — |
October | 9:30 PM – 11:30 PM | — |
Step 6 : Make Your Shots Stand Out with Foregrounds
A photo of the night sky is beautiful. A photo that tells a story is unforgettable. That’s where foregrounds come in. They give depth, and context and evoke emotion in your images.
It could be a tree, a mountain, or a lake reflecting the stars. However, imagine parking a sleek, exotic car under the Milky Way. The contrast between engineering marvels and the beauty of the cosmos tells a story like no other. You can rent one for a night in Los Angeles, a nifty little trick we love using for clients at Beige Media.
Step7 : Editing. Where the Magic Really Pops
Even pros will admit, the secret of editing is to breath life to photos. The raw image straight from the camera is usually dull.
To start, adjust the white balance to highlight the natural blues and purples. Then increase the contrast and clarity to make the Milky Way pop. Finally, use noise reduction to smooth out any grain left from the high ISO.
If your laptop starts wheezing under those big RAW files (we’ve all been there) you can rent a professional editing studio for an hour. At Beige Media, we often help creators fine-tune their astrophotography, or other work for print, web and social media.
Step 8: Looking Ahead? Move Past the Fundamentals
After capturing your first shot of the Milky Way, feel free to expand your creativity. Consider trying photo stacking: joining multiple pictures to eliminate noise. You can also try shooting star trails, or even stunning panoramas.
Each new skill to learn also presents additional creative opportunities. This is a continuous process
Just Get Out There and Give It a Shot
Unfortunately, the first few tries may be your worst. This is likely the case with any form of veteran astrophotographer; everyone starts somewhere. You have to learn to expect photos with dark or blurry stars.
Remember, the first step is the most vital. Get your camera, go outside, and look up. The stars have been waiting for billions of years; tonight, let them inspire you
Frequently Asked Questions (FAQ)
1. Do I need expensive gear to start astrophotography?
Nope! You don’t need a top-of-the-line camera to capture stars. Any DSLR or mirrorless camera with manual mode will do the job. Even older or budget-friendly models can deliver amazing results if you use the right settings and a sturdy tripod.
2. What’s the best time of year to photograph the Milky Way?
The Milky Way core is most visible from March to October in the Northern Hemisphere. Early in the season, it appears before dawn, while later in the year you can shoot it right after sunset. May, June, September, and October are the easiest months for beginners because the timing is more convenient.
3. Why do my star photos look blurry?
Blurry stars usually happen because of two things: your focus is off or your shutter speed is too long. Always switch to manual focus, zoom in on a bright star, and adjust until it’s a tiny, sharp point. And keep your shutter speed under 20 seconds to avoid star trails.
4. Can I do astrophotography in a city?
It’s possible, but light pollution will make it harder to see and capture faint stars or the Milky Way. If you can, travel to a dark-sky location away from city lights. Even a short drive to the countryside or a national park can make a huge difference.
5. How can I make my photos more creative?
Add an interesting foreground to tell a story — like a tree, mountain, or lake reflection. If you want something unique, imagine placing a sleek exotic car under the Milky Way. The contrast between earth and cosmos makes your shot stand out and adds a cinematic touch.